Classical Guitar Technique: The Barre Chord
This post is going to show you how to effectively play a barre chord: the classical guitar technique for playing chord shapes higher up the fretboard. And hopefully reduce that annoying buzzing sound when you use barre chords.
To Barre or Not Barre?
A barre chord is the guitar’s answer to shifting key center harmony. Barre chords are based on using open string chords shapes, which are then shifted up the fretboard. Thus allowing guitarists to transpose into different keys.
Using open string shapes, the first finger of the LH takes over the role of the nut, hence the name barre, which means – barred (from the French barré). And that new shape is ready to be moved up the fretboard, and into a new key.
That means that as long as you know the root note of the chord, you can move the shape anywhere on the fretboard into any key. The CAGED System is the perfect example of this principle at work.
Check out this post on the CAGED System which utilizes barre chords to learn the fretboard.
Barre Technique
How many of us struggle with playing barre chords? Especially in pieces such as Villa-Lobos’ Etude No. 1 (if haven’t learnt this piece yet, check out this post to help you learn ALL of it) , where there are lots of them consecutively. I know I did in the beginning, my first finger used to cramp up like crazy after an extended period of playing! Why? check out the pic below!
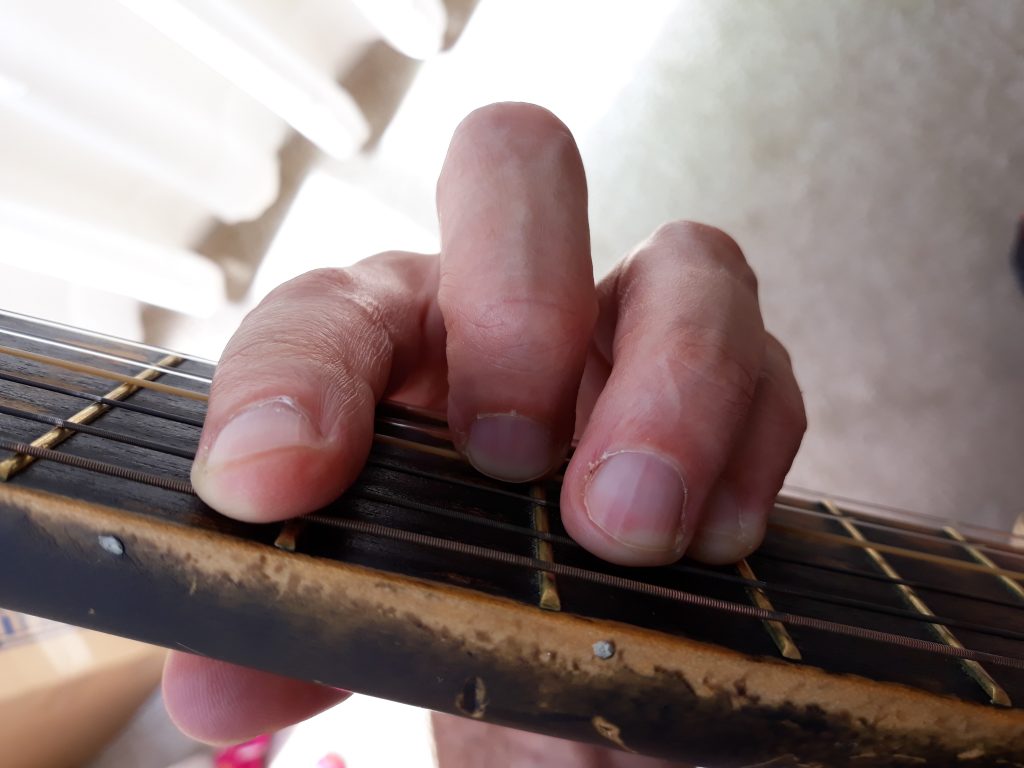
What does an incorrect barre chord look like?

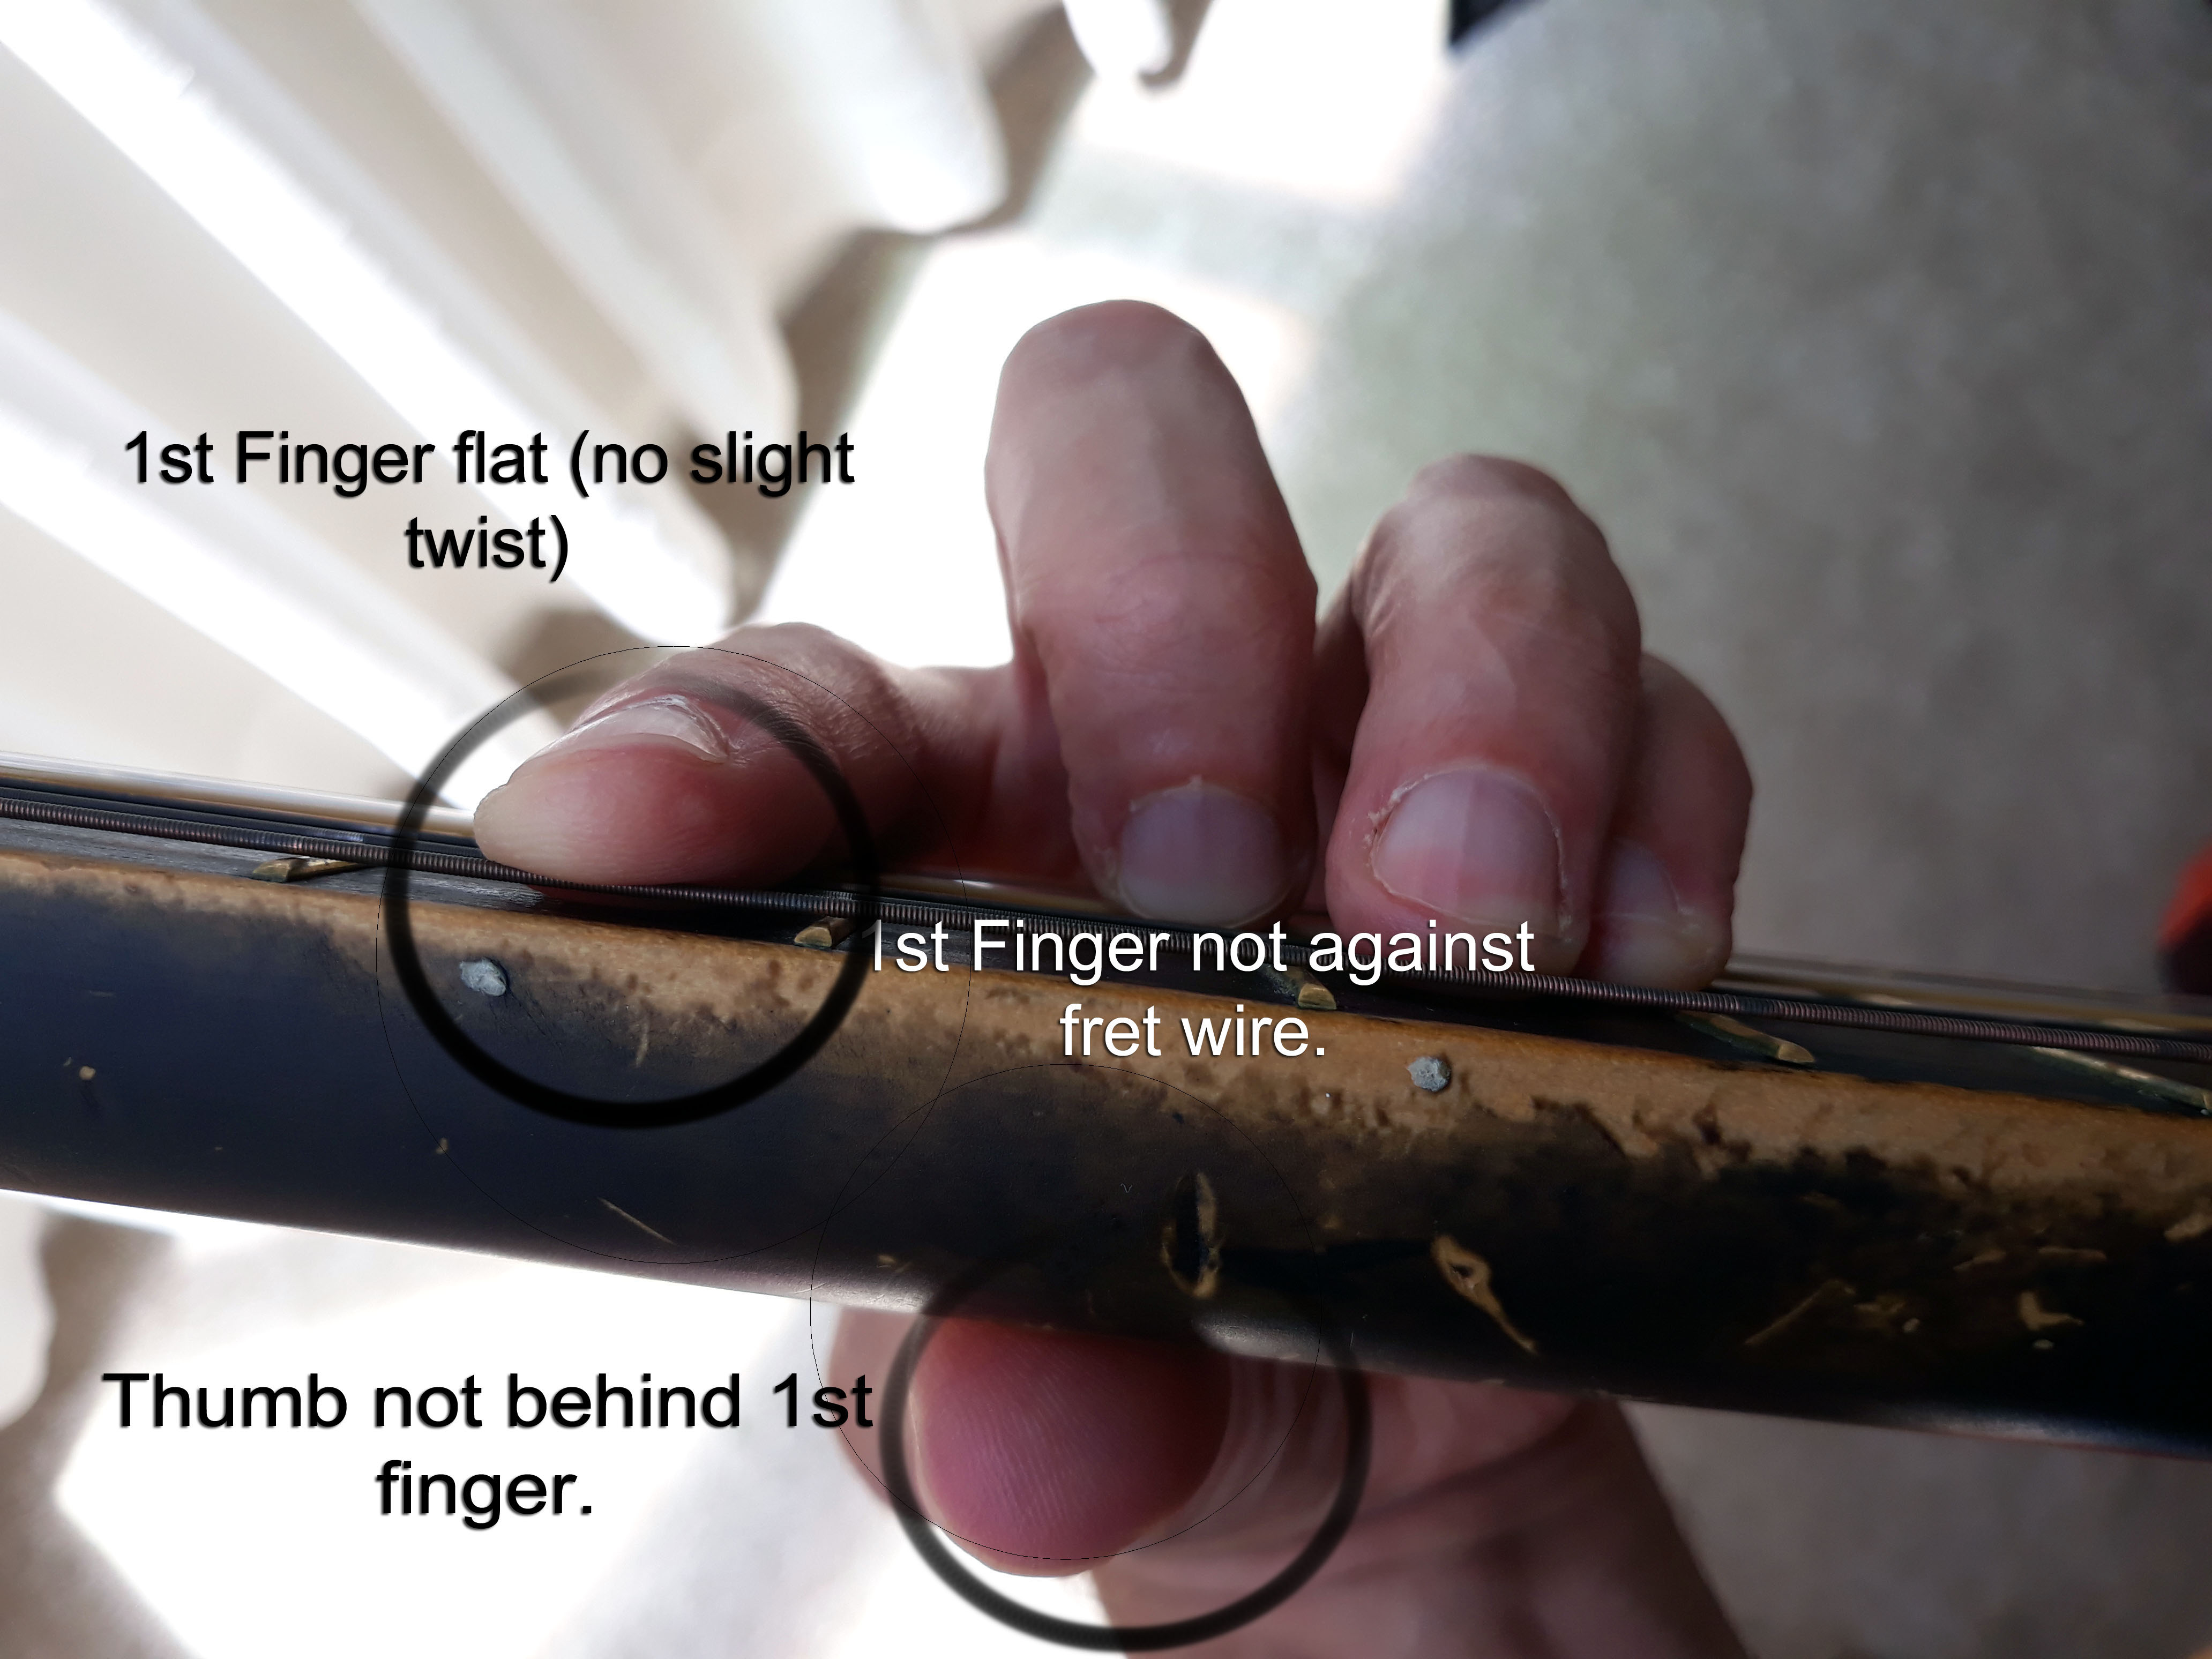
Does your position look like this? That picture above represents a lot of energy in order for the chord notes to be clean, just because of bad positioning on the frets, Want to see the correct positioning?
Correct Barre Chord Position
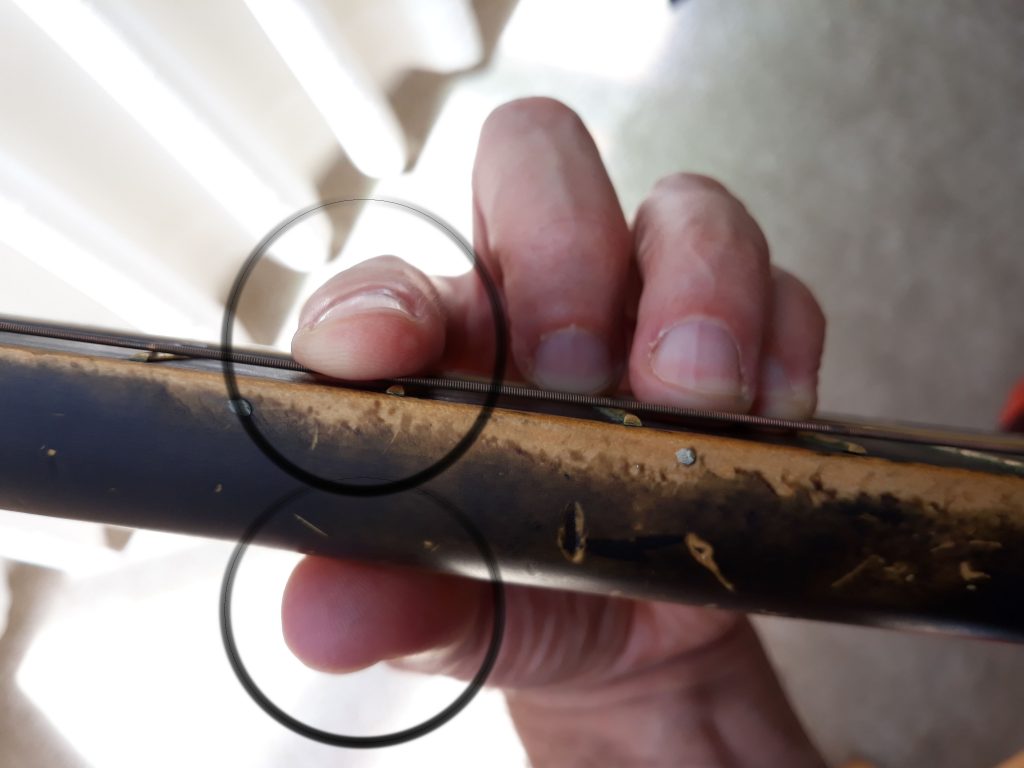
Compare the two pictures above, and to your own hand. Does it look like this? Notice how the circles line up now.
Cramps or Sore Hands?
As stated above I also got cramps in my LH. Why? Very simple: I kept squeezing with my thumb! I did this for awhile until I discovered three simple and effective ways of playing barre chords.
- First: LH Thumb behind the 1st finger (see above)
- Second: slight twist to LH 1st finger (to get a little bone into it)
- Third: no creases on strings (where the joints are)
- Third: pull LH elbow down slightly (gravity needs help)
It really is that simple, the last point is probably the most critical though, you need to use leverage to get the notes clean. Do not squeeze too much with your thumb. The thumb is for support only, and light support.
Leverage
Leverage both arms too! That means letting your Left arm relax a little for gravity to help, but also with some full barre chords, you need to pull back with the LH elbow. And, because once you pull on the left side, the right side will need to compensate for this. You will need to counterbalance, through the guitar, with a little backwards pull on the Right side.
You Are Unique
One last point, you have have to understand your physiognomy: your body. Each person has a unique finger and so requires a unique positioning. The size, and skin and even meat covering your finger is unique to you. You will need a little experimentation on how that finger sits, barred, on the fretboard.
Below is a flat finger with no twist. This position allows more meaty flesh contact, no bone; and more of the creases over the strings.

This relates directly to where your skin creases are too. Try not to let them sit on a string, as it will buzz. How much pressure you need, due finger girth and covering. All these aspects need thinking about to get that chord sounding clean.
Below is the first finger with a slight twist. This allows me to get some bone against the strings, and to get up against the fret wire. All of which add up to cleaner barre chords.
Another Angle
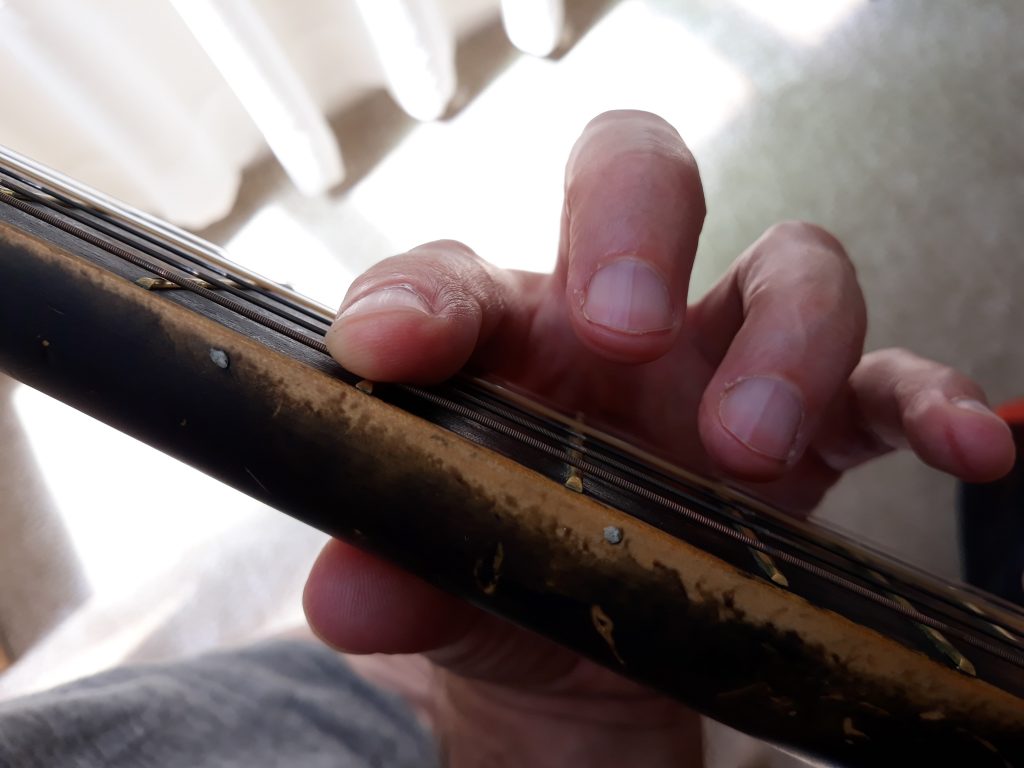
One final picture. This is what a barre chord should look like! At least on my hand.
